The room is dead quiet except for the rhythmic, rhythmic thwack of your fingers dancing across mechanical keys. Then, out of nowhere, a single tap produces an erratic double space, or a stuttering repeat of the letter ‘e’ right in the middle of a sentence. Your cadence stumbles, breaking the smooth momentum of your work as you reach for backspace once again.
The instinctive fear is that your favorite custom board has suffered a catastrophic failure, that the solder points have cracked or the copper inside has given up entirely. You imagine packing the entire unit into a box or shelling out eighty dollars for a brand-new set of boutique switches. But mechanical hardware rarely fails with such melodrama; more often than not, it is simply throwing a quiet temper tantrum born of microscopic vibration.
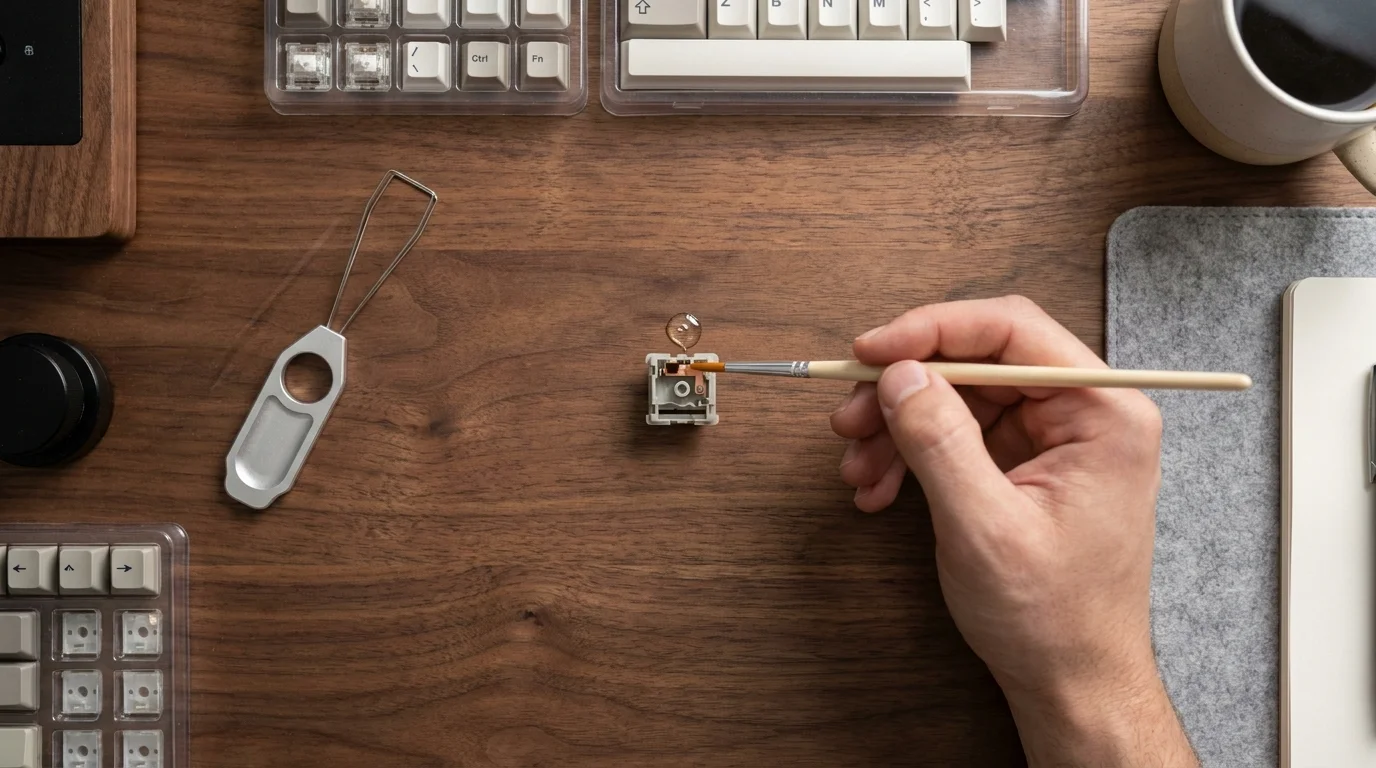
Under the soft glow of a desk lamp, the fix does not require high-voltage rework tools or complex firmware reflashing. It takes nothing more than ten minutes of calm focus, a switch puller, and a thick translucent grease clinging to the tip of a fine nylon paintbrush.
The Microscopic Dance of Copper and Air
Switch chatter is not a death sentence for your keyboard; it is an acoustic echo inside a tiny plastic box. When you press a mechanical key, an internal plastic stem pushes two paper-thin leaves of metal contact together. In an ideal world, they meet once, close the electrical circuit cleanly, and release without hesitation.
Over months of furious typing, tiny oxidation films, microscopic dust specks, or slight metal fatigue cause the leaves to physically flutter. The microcontroller inside your board registers those microscopic vibrations as several distinct keystrokes happening within milliseconds. Instead of a firm handshake, the switch is executing a trembling stutter.
This is where damping physics changes the game entirely. Applying an ultra-thin layer of non-conductive dielectric grease to the rear of the static contact leaf does not disrupt electrical signaling. Instead, it acts as a shock absorber, swallowing the acoustic micro-rebound and forcing the metal to settle instantly against its mate without bouncing.
- Sony WH-1000XM5 headphones beat studio monitors on value during seasonal inventory cuts
- Google Chrome command palette shortcut strips away confusing deep nested settings
- iPhone 16 Pro battery life extends instantly when disabling aggressive background location
- iPad Pro M4 upgrade traps buyers into paying for unusable processing power
- Pixel 9 Pro temperature sensor exposes unexpected high heat thermal leaks
Julian Vance, a thirty-four-year-old audio mastering engineer from Portland, spent years throwing away vintage switches every time key bounce crept into his editing console. It was only after dismantling a chatter-plagued batch of custom linear switches and testing their metal leaf resonance with a high-speed oscilloscope that he realized the truth. A minute whisper of synthetic grease behind the contact leaf silenced the chatter permanently, turning boards destined for the recycling bin back into rock-solid daily drivers.
Tailoring the Fix to Your Switch Architecture
Every switch design reacts slightly differently to damping, and knowing your switch type ensures you apply grease precisely where it works miracles without dulling the tactile signature you love.
For linear switches, the process is straightforward and forgiving. Since there is no tactile bump to preserve, you can apply grease smoothly across both the rear dampening zone of the static leaf and the front contact face without altering the smooth, clean drop of the keypress.
For tactile switches, precision is everything. You want to dampen the shuddering metal leaf without touching the tactile legs of the stem. Applying grease directly to the front contact bumps can diminish that crisp, snappy tactile feedback, turning a sharp tactile feel into a muddy, sluggish press.
For click-bar and click-jacket boards, keep your brush strictly confined to the rear plate of the leaf. Stray lubricant on the click mechanism will silence the clicky acoustic pop that gives these switches their distinct personality.
The Surgical Brushstroke: Restoring Pure Contact
Fixing switch chatter is a calming, deliberate ritual that requires gentle hands and minimal material. Work under good light and take your time with each key.
- Hot-swap removal: Use a metal switch puller to gently depress the top and bottom retention tabs of the noisy switch, easing it vertically out of the PCB plate.
- Housing separation: Place the switch into a dedicated switch opener, or use a fine pair of tweezers to lift the four tiny corner clips until the upper housing pops free.
- Stem and spring extraction: Lift the slider and center spring out of the bottom housing, setting them aside on a clean microfiber cloth.
- Cleaning the contact: Dip a clean micro-applicator in 99% isopropyl alcohol and lightly swab between the metal leaves to sweep away trapped dust or stray debris.
- Applying the grease: Lightly coat the tip of your brush with synthetic dielectric grease, wiping off any excess against the rim of the jar until the bristles appear barely frosted.
- Targeted placement: Slide the brush tip gently behind the rear leaf, applying a microscopic film along the flat metal backplate to absorb physical bounce.
- Reassembly and seating: Seat the spring, lower the stem back into its guide tracks, snap the top housing shut until it clicks, and press the switch firmly back into the board socket.
The Tactical Toolkit for this repair is compact and simple to assemble:
- Size 00 or 0 fine nylon artist brush
- Synthetic non-conductive dielectric grease (such as Krytox 205g0 or Super Lube synthetic grease)
- Standard hot-swap switch puller and switch opener
- 99% Isopropyl alcohol and lint-free cotton swabs
A Quiet Confidence at the Fingertips
In an age where consumer electronics encourage us to replace entire machines the moment a single component acts up, fixing a mechanical keyboard with a simple dab of grease is deeply grounding. It reconnects you with the physical reality of the tools you use every single day.
When you finish reassembling your board, sit back and type a paragraph at full speed. The double-typing vanishes, replaced by a deep, solid acoustic bottom-out and a clean, predictable response. Taking control of these small mechanical details brings a lasting peace of mind every time your fingers touch the keys.
The secret to mechanical perfection is never brute force; it is knowing the single microscopic point where friction and dampening restore balance.
| Key Point | Detail | Added Value for the Reader |
|---|---|---|
| Leaf Flutter Mitigation | Dielectric grease absorbs physical micro-bounce behind the metal leaf without blocking conductivity. | Eliminates false double-keystrokes instantly without replacing hardware. |
| Targeted Application | Use a size 00 fine nylon brush to deposit grease exclusively on the leaf backplate. | Preserves the original tactile bump and click feel of the switch. |
| Cost-to-Repair Ratio | Requires pennies worth of lubricant and basic hand tools instead of purchasing a new board. | Saves significant money and keeps functional hardware out of waste streams. |
Frequently Asked Questions
Will dielectric grease short out my keyboard circuit board?
No. True dielectric grease is completely non-conductive, meaning it will not bridge electrical connections or cause electrical shorts across your PCB traces.Can I fix switch chatter without opening the switch housing?
While dripping alcohol into an assembled switch might temporarily clear dust, lasting chatter relief requires opening the switch to grease the leaf backplate directly.How do I tell if chatter is caused by the switch or my software settings?
Test your keyboard on an online switch chatter tool. If the repeated keypress occurs consistently on only one or two specific keys within a 15ms window, it is a physical switch bounce issue.What type of grease works best for chatter suppression?
Krytox 205g0 or Super Lube synthetic dielectric grease provide the perfect viscosity to damp metal leaves without drying out or separating over time.Does this method work on soldered mechanical keyboards?
Yes, though you will need to desolder the affected switch from the board first to safely open the housing and reach the internal contact leaf.