The brown cardboard mailer tears open with a dry rasp, shedding tiny paper fibers onto your kitchen table. Inside sits a plain white box, devoid of sleek retail artwork, held together by a single band of clear packing tape. You cut through it, gently rocking the phone out of its bubble wrap cocoon. The glass feels cool, clean, and reassuringly heavy in your hand, carrying that faint scent of industrial alcohol wipes common to certified refurbished distribution hubs.
You press the power button on the right rail. A sharp, haptic pulse taps against your thumb, and the screen blooms to life with an aggressive flash of brand color. The animated boot sequence dances across the glass, glowing bright and flawless against a pitch-black background. To anyone unboxing a refurbished bargain, that snappy first light feels like a victory against retail markups.
Yet that rapid burst of vibrant graphics serves a dual purpose. In high-volume grading warehouses, quick boot screens act like a magician’s flash powder, dazzling your retinas just long enough to bypass immediate scrutiny. Tiny subpixel dropouts hide in plain sight behind animated color sweeps and dark system default themes, quietly ticking down your return window before your eyes ever spot the dead silicon.
The Stage Curtain of the Second-Hand Screen
When you purchase Amazon Renewed phones, you expect rigorous quality control. The reality of industrial refurbishment is far more pragmatic. Phones are graded at bench stations under cold fluorescent tubes where processing speed dictates profit margins. A device gets wiped, polished, connected to an automated battery diagnostic rig, and given a five-second visual pass before landing in a box.
Think of the default setup interface as a theater curtain. Modern mobile operating systems now boot directly into dark mode or dynamic gradient splash screens designed to hide imperfections. OLED panels light up individual organic diodes, meaning a cluster of dead subpixels on a dark backdrop simply blends into the surrounding blackness. Until an application forces every single red, green, and blue diode to illuminate uniformly at maximum luminance, your screen is running a shell game.
The flaw is not always a catastrophic crack or a bleeding purple ink stain. Often, it is a micro-fracture across a single row of indium tin oxide trace wiring, or a cluster of unpowered subpixels no larger than a grain of table salt. Spotting these micro-defects early changes your purchase from an expensive gamble into genuine value, provided you know how to look behind the curtain before your ninety-day warranty expires.
- Whoop 4.0 bands skew sleep statistics when greasy grime clouds optical sensors
- Apple 70W chargers scorch smartphone backplates during aggressive overnight battery charges
- Google Authenticator apps block predatory SIM swaps by replacing intercepted text codes
- AirPods Pro 2 drop choppy audio streams until clearing network cache settings
- iCloud Photo Library wipes local camera rolls during careless new phone setups
Marcus Vance, a 34-year-old hardware diagnostic technician based out of Dallas, spent four years working alongside third-party refurbishing lines. He witnessed firsthand how secondary market processors triage thousands of returned flagships each week. “Bench technicians have roughly ninety seconds per unit to confirm visual integrity,” Marcus explains. “If a phone boots cleanly, holds a charge, and accepts a touch swipe on the setup welcome bar, it passes. Nobody sits in a dark room searching for three dormant green subpixels in the notification tray. That inspection job is silently handed off to the customer.”
Dialing Into the Raw Hardware Layer
You do not need specialized lab tools or magnifying loupes to inspect your display. Most mobile hardware houses a hidden engineering environment buried beneath the dialer pad. These secret service menus bypass consumer interface rendering entirely, driving raw signals directly to the panel controller to expose dormant diodes, yellowing adhesive lines, and dead digitizer paths.
For owners holding a Samsung Galaxy or similar Android hardware purchased through renewed programs, open your native Phone dialer app and punch in the maintenance string: *#0*#. The standard dialer vanishes instantly, replaced by a brutalist grid of gray engineering tiles known as the Hardware Diagnostic Menu.
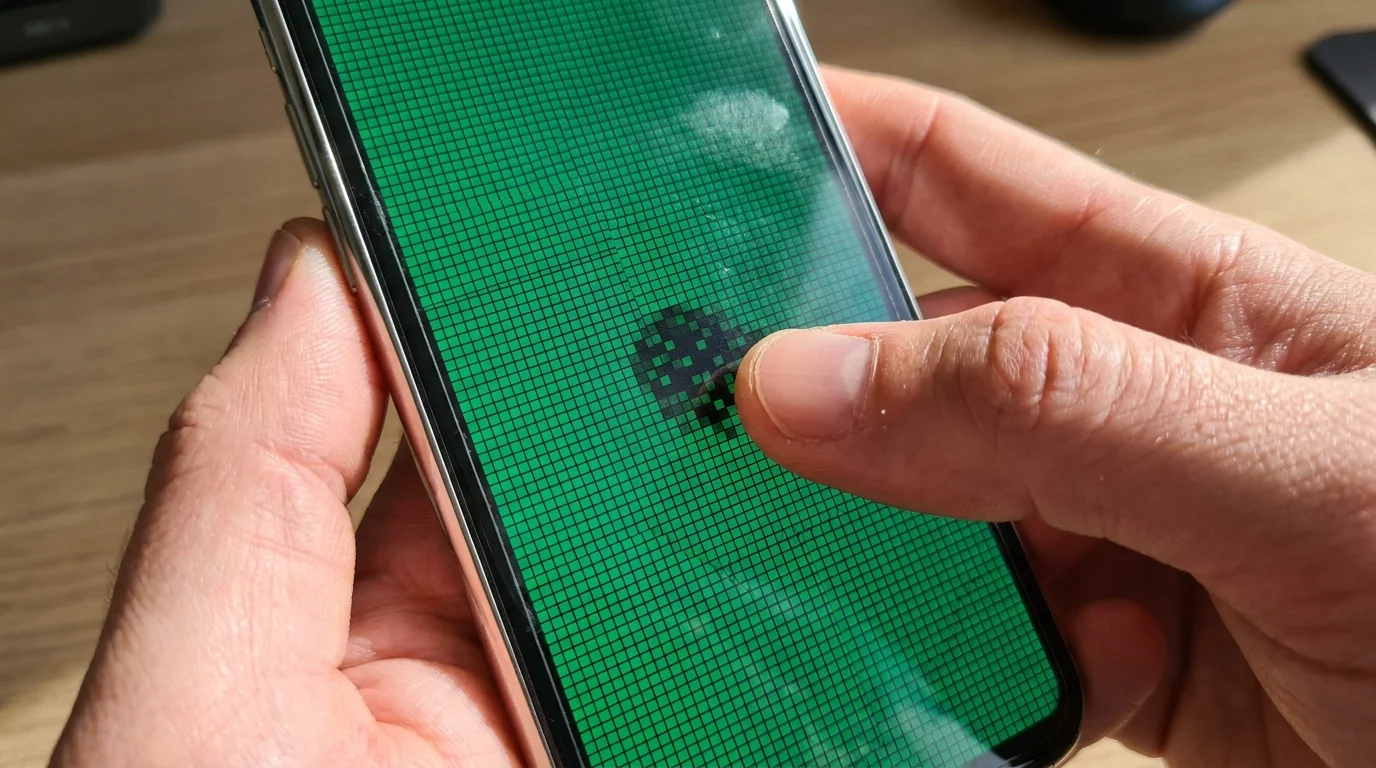
Tap the tiles labeled RED, GREEN, and BLUE in sequence. Each selection floods the entire display with an uncompromising, solid primary color, stripping away notification shades, navigation bars, and background wallpapers. Sweep your eyes across the glass in a slow grid pattern. A dead subpixel will reveal itself as an unmistakable black speck against the field of pure light. Next, tap the RECEIVER tile; the panel will render an eye-searing, solid white screen that instantly exposes panel burn-in, uneven backlighting, or localized yellowing caused by improper UV curing during previous third-party glass replacements.
If you are testing an iPhone or a device where service dialer codes are carrier-restricted, you can recreate this exact engineering canvas through your browser. Navigate to a blank color test canvas, switch to full screen, and maximize brightness. Running this five-minute screen test should be as automatic as peeling off the protective transport film.
Diagnostic Approaches for Every Device Profile
Not every smartphone panel behaves the same under stress. How you assess your screen depends heavily on the underlying display technology and your daily habits.
- For the OLED Enthusiast: High-end devices rely on self-emissive organic diodes. Run your diagnostic sweep in a pitch-black room at roughly fifteen percent brightness. Look closely for uneven gray uniformity or “dirty screen effect” across dark backgrounds, which indicates diode degradation from an overly aggressive previous owner.
- For the LCD Budget Flagship: Many budget-friendly renewed devices still feature liquid crystal panels with physical edge backlights. Set your diagnostic screen to pure white and check the perimeter edges. Pinched diffuser sheets or worn adhesive will manifest as faint, shadowy “vignette” corners or light bleed halos.
- For the High-Contrast Reader: If you spend hours reading digital text against stark backgrounds, digitizer integrity matters as much as pixel health. In the diagnostic menu, open the TOUCH test and drag your finger continuously across the crosshatch grid. If the line drops or stutters along a specific horizontal band, the digitizer matrix has a hairline trace crack that will frustrate your typing later.
The Mindful Five-Minute Arrival Protocol
Turning an unboxing into a precise verification routine protects your wallet and frees you from buyer remorse. Treat this ritual not as an act of suspicion, but as a calm, deliberate inventory of your personal everyday tool.
Perform this inspection before transferring accounts, syncing photo libraries, or setting up two-factor authentication tokens. Reverting a defective device is effortless when it remains in a factory-clean state.
- Clear the workspace: Wipe down your kitchen or desk surface, power down overhead fluorescent lights, and draw your window blinds to eliminate ambient surface glare.
- Clean the glass: Use a dry microfiber cloth to remove dust, lint, and packing adhesive oils that could easily be mistaken for physical screen defects.
- Engage the dialer code: Open the phone dialer, input
*#0*#(or launch a full-screen primary color test pattern), and crank display brightness to one hundred percent. - Inspect primary color planes: Cycle through solid red, green, blue, and white screens. Look closely around the punch-hole camera and display corners where stress fractures congregate.
- Map the digitizer grid: Complete the touch-box maze test without lifting your finger. Ensure every single square turns green before exiting the engineering loop.
A Foundation Built on Certainty
Buying refurbished technology is an environmental and financial triumph when executed with clear eyes. You rescue capable silicon from forgotten distribution shelves and bypass the manufactured urgency of annual product upgrade cycles. But true ownership begins when you understand the physical reality of the machine in your palm, looking past the polished packaging and sleek marketing animations.
When you run your own diagnostics on day one, you strip away the uncertainty that lingers behind second-hand hardware. You transform a questionable bargain into a proven, reliable companion, knowing every diode beneath the glass responds exactly when called upon.
“A refurbished display only earns its price tag once you force every subpixel to speak for itself in absolute color.”
| Diagnostic Check | Technical Method | Added Value for the Reader |
|---|---|---|
| Subpixel Integrity | Full-screen RGB color cycling via service code (*#0*#) | Detects permanent black or stuck pixels before the return period ends. |
| Digitizer Continuity | Hardware Touch Grid mapping trace test | Identifies dead touch zones that cause ghost touches and missed keystrokes. |
| Backlight Uniformity | Full-brightness 100% white saturation canvas | Uncovers uneven adhesive curing, water marks, and third-party panel swaps. |
| Low-Luminance Health | 5% to 15% solid gray image inspection in dark room | Reveals OLED burn-in and pixel degradation hidden by default dark mode themes. |
Frequently Asked Questions
Will accessing the hidden diagnostic dialer menu void my Amazon Renewed warranty?
No. The diagnostic dialer menu is a read-only factory testing suite integrated directly into the operating system firmware by the hardware manufacturer. It does not modify system partitions, unlock bootloaders, or alter warranty status.What should I do if the *#0*# code does not open on my phone?
Certain mobile carriers disable access to native hardware service dialer codes. If your dialer does not react, download an open-source display tester application or open a browser window displaying solid full-screen red, green, blue, and white color canvases.How many dead pixels are considered acceptable on an Amazon Renewed device?
Under Amazon Renewed guarantee policies, screens sold under “Excellent” or “Premium” tiers should be free of visual imperfections visible at arm’s length. Even a single dead pixel cluster inside your primary reading zone justifies an immediate zero-hassle exchange.Can stuck subpixels be fixed with flashing screen software?
Software that rapidly cycles flashing colors can occasionally unstick transistors that are hung in an active state. However, true dead subpixels—those that remain permanently dark across all RGB planes—are caused by physical electrical disconnects and cannot be repaired via software.Why does dark mode disguise screen damage so effectively?
On OLED panels, black pixels are completely unpowered. If an operating system defaults to dark themes right out of the box, defective diodes remain dormant and blacked out, blending seamlessly with the interface until bright imagery is rendered.